วันอาทิตย์ที่ 25 สิงหาคม พ.ศ. 2556

Programming (การโปรแกรม) with Visual Basic 6.0

by Teacher  Phaitoon  Yaemprasuan
                                                                                           picta55@gmail.com
                                                                                           occupatech@gmail.com
                                                                                           http://picta55.blogspot.com


What is Visual Basic?
วิชวลเบสิกคืออะไร


Visual Basic is a tool that allows us to develop Windows (Graphic User Interface - GUI) applications.  The applications have a familiar appearance to the user.
วิชวลเบสิก เป็นเครื่องมือของเราในการสร้างแอ็ปปลิเคชัน (โปรแกรมประยุกต์) ที่ทำงานภายใต้ระบบปฏิบัติการ Windows ซึ่งแอ็ปปลิเคชันที่ได้จะมีรูปแบบการติดต่อกับผู้ใช้เป็นกราฟิก (GUI : Graphic User Interface)

 Visual Basic is event-driven, meaning code remains idle until it is called upon to respond to some event (e.g. mouse clicking, button pressing, menu selection, ...).  Nothing happens until an event is detected.  Once an event is detected, the code corresponding to that event (event procedure) is executed.  

วิ ชวลเบสิก จะใช้ Event (เหตุการณ์) เป็นตัวขับเคลื่อนคำสั่ง (event-driven)  หมายความว่า โค้ดของโปรแกรม จะยังไม่ทำอะไร (idle) จนกว่ามันจะถูกเรียกให้ตอบสนองต่อ event  (เช่น การคลิกเมาส์  การกดปุ่ม  การเลือกเมนู  ฯลฯ)  นั่นคือ จะไม่มีอะไรเกิดขึ้นจนกว่า event จะถูกตรวจพบ  เมื่อนั้นแหละ code ของโปรแกรมก็จะตอบสนองต่อ event นั้นๆ  ในลักษณะของโปรแกรมย่อยๆ หรือโมดุล (event procedure)
 

 How to program with Visual Basic?
จะโปรแกรมด้วยวิชวลเบสิกอย่างไร
 

Steps in Developing Application 
ขั้นตอนการพัฒนาแอ็ปปลิเคชัน

There are three primary steps involved in building a Visual Basic application:
มีขั้นตอนหลักๆ 3 ขั้นตอน ที่เกี่ยวข้องกับการสร้างแอ็ปปลิเคชันด้วยวิชวลเบสิก
1.    Draw the user interface  ออกแบบส่วนติดต่อกับผู้ใช้
2.    Assign properties to controls  กำหนดคุณสมบัติให้กับคอนโทรล
3.    Attach code to controls  ผูกติด code เข้ากับคอนโทรล


Stop Watch Application
โปรแกรมจับเวลา

            SOURCE  :   www.kidwares.com

1 At the "Start-up Menu" of our Windows Desktop, let's find where "Microsoft Visual Studio 6.0" is, and click on it. Then we can see some shortcuts to the applications of the software suite, and "Microsoft Visual Basic6.0" is one of them and it is also our "target software" right now, let's select it.
ณ  สตาร์ทอัพเมนู ที่หน้าเดสต์ท็อปของระบบวินโดวส์  นักเรียนลองหาเมนู Microsoft Visual Studio 6.0  และคลิกเมาส์เลือก 
เรา จะเห็นช็อตคัตของแอปปลิเคชันต่างๆ ที่รวมกันอยู่ในซอฟต์แวร์ชุดนี้ รวมถึง Microsoft Visual Basic6.0 ซึ่งเป็นซอฟต์แวร์เป้าหมายที่เราจะใช้ในงานนี้แหละ  เราก็เลือกซะนะ

At the "Start-up Menu of Windows", Find where the "Microsoft Visual Basic 6.0" is.
ณ สตาร์ทอัพเมนูของระบบวินโวส์  ให้หาว่า Microsoft Visual Basic 6.0 อยู่ไหน


2 We now at the main screen of Visual Basic 6.0 with its "New Project" window. Let's click on the "New" tab and select "Standard EXE" icon.
 ตอน นี้เราก็มาอยู่ ณ หน้าจอหลักของ Visual Basic 6.0 ซึ่งมีหน้าต่าง New Project โชว์อยู่  ให้เราเลือกแท็บ New และสัญรูป Standard EXE 
Select the "Standard EXE" icon  ให้นักเรียนเลือกสัญรูป Standard EXE

3 Before we go on, let's consider the components of the toolbar of Visual Basic 6.0.  Properties window, Run and Save project are what we have to focus on now.
ก่อนอื่น ขอให้เราลองพิจารณาแถบเครื่องมือของ Visual Basic 6.0 กันก่อน  Properties window, Run, Save project เป็นอะไรที่เราจะต้องโฟกัสออนกันก่อนตอนนี้

Design View of Visual Basic 6.0   มุมมองในโหมดออกแบบของวิชวลเบสิก

4 Controls are the genius tools that can be attached by any codes that can control any events such as clicking mouse or pressing key. Now the "Command Button" and the "Label" are the controls that we are going to use.
คอนโทรล เป็นเครื่องมืออัจฉริยะ ที่สามารถจะนำเอาโค้ดคำสั่งมาผูกติด ทำให้สามารถควบคุมเหตุการณ์ได้ อาทิ  การคลิกเมาส์  หรือการกดแป้นพิมพ์  ตอนนี้คอนโทรลที่เรากำลังจะใช้งานก็คือ Command Button และ Label

Controls of Visual Basic 6.0   คอนโทรลต่างๆ ของวิชวลเบสิก 6.0

5 Visual Basic programming begins with a form which has been named "Form1" by default. Visual Basic form simulates itself as platform which can receive many kinds of objects that created by the controls. Any object has its properties that has been shown in the properties window.
การ โปรแกรมด้วยภาษาวิชวลเบสิกนี้ จะเเริ่มจาก Form ซึ่งโปรแกรมจะกำหนดชื่อให้ก่อนเลยว่า Form1 (เราสามารถเปลี่ยนชื่อได้)  ฟอร์มของวิชวลเบสิกจะจำลองตัวมันเองเป็นเสมือนแพล็ตฟอร์ม ที่สามารถจะรองรับวัตถุหรืออ็อบเจ็กต์ที่สร้างจากคอนโทรล (ด้านซ้าย)  และวัตถุนั้นมันจะมีคุณสมบัติหรือพร็อพเพอร์ตีส์ของตัวมันเอง โดยจะแสดงให้เราเห็นในหน้าต่างพร็อพเพอร์ตีส์ (ด้านขวา)

Form and Controls are variety kinds of object of Visual Basic that have their own properties.
Form และ Controls เป็นอ็อบเจ็กต์(วัตถุ) ที่หลากหลายของ Visual Basic ที่มี properties ของตนเอง
6 Here we go on creating a design job like the following picture.  
    -  Using the "Command Button" control to draw the three sequence command buttons, Command1, Command2 and Command3. 
   -  Using the "Label" control to draw the six sequence labels, Label1,
Label2, Label3, Label4, Label5 and Label6 
ให้นักเรียนลงมือสร้างงานออกแบบ ตามรูปด้านล่างนี้เลยนะ
   -  โดยการใช้คอนโทรล Command Button วาดปุ่มคำสั่งขึ้นมาสามปุ่มตามลำดับ
   -  โดยการใช้คอนโทรล Label  วาดอ็อบเจ็กต์ต่อเนื่องกัน รวม 6 เลเบิล

Form1 would have three command buttons and six labels now.
Form 1 ที่เราออกแบบนี้ก็จะมีปุ่มคำสั่ง (command button) 3 ปุ่ม  และมีฉลาก (label) รวม 6 ฉลาก  


7 Click on "Form1", we can see its properties, rename it with "frmStopWatch" (frm is a pefix which comes from "form"). And change its caption to "Stop Watch Application".
คลิ กที่อ็อบเจ็กต์ Form1 เราจะเห็น properties ของมันอยู่ทางด้านขวา  ให้เราปรับเปลี่ยนชื่อ (name) ของมันใหม่เป็น "frmStopWatch" (frm เป็นคำนำหน้าชื่อ มาจาก form นั่นเอง)  และปรับเปลี่ยน Caption (คำอธิบายอ็อบเจ็กต์) ให้เป็น "Stop Watch Application"

Form1 Properties Configurations  การตั้งค่าคุณสมบัติของอ็อบเจ็กต์ Form1


8 Click on "Command1", yes we are about to specify the properties of this object. Rename it with "cmdStart" (cmd is a prefix which comes from "command button") and also refill its caption with "&Start Timing" (& is a prefix of the key letter that a user can press on this key together with the "alt" key instead of click on this command button). 
คลิ กปุ่ม Command1 เพื่อเปลี่ยนคุณสมบัติ  โดยให้ชื่อใหม่ว่า cmdStart (cmd เป็นคำนำหน้า มาจาก Command Button)  และเปลี่ยน Caption ให้เป็น "&Start Timing" (& นำหน้าตัวอักษรสำคัญที่จะบอกผู้ใช้ให้รู้ว่า เขาสามารถกดคีย์นี้ร่วมกับคีย์"alt"ที่คีย์บอร์ด เพื่อใช้งาน command button แทนการคลิกเมาส์ได้).


Change the properties of the command button :  name and caption
ให้นักเรียนเปลี่ยนชื่อ และแค็ปชันของปุ่มคำสั่ง

9 Do it the same way as the previous step. ทำเหมือนขั้นตอนที่แล้ว
Change the properties of the command button :  name and caption


10 Do it the same way as the previous step.ทำเหมือนขั้นตอนที่แล้ว

Change the properties of the command button :  name and caption


11  Change only the captions of Label1, Label2 and Label3 according to the following picture. ให้ เปลี่ยนเฉพาะ Caption ของทั้งสาม Labels เท่านั้น  ไม่ต้องเปลี่ยนชื่อ (เนื่องจากเป็นแค่ป้ายกำกับเท่านั้น ไม่ได้เกี่ยวข้องกับการกำหนดโค้ดโปรแกรม)

Change the properties of the three labels :   captions  เปลี่ยนแค่แค็ปชันของสามเลเบิลแรก

12  Change the properties of the other last three labels, "Label4", "Label5" and "Label6" by renaming them to "lblStart", "lblEnd" and "lblElapsed" and erase their captions until they are blank.
เปลี่ยน properties ของ Label4, Label5, Label6 โดยเปลี่ยนชื่อเป็น lblStart, lblEnd, lblElapsed  และลบ captions ของทั้งสามเลเบิลออกจนว่างเปล่าทั้งหมด

Change the properties of Label4, Label5 and Label6 according to the picture. 
เปลี่ยนชื่อของสามเลเบิลท้าย  และเคลียร์แค็ปชันให้ว่าง (blank)
13  Now we have just already designed and configured all of related objects, the next step of us is coding our program. Let's click on the menu-bar at the "View" command tab, then select the "Code" sub-command, the view-code window will show up. Yes, we are going to enter our source codes of our application here.
มา ถึงตอนนี้ เราก็ได้ทำการออกแบบ และกำหนดคุณสมบัติต่างๆ ให้กับอ็อบเจ็กต์ต่างๆ ที่เกี่ยวข้องไปเรียบร้อยแล้ว  ขั้นตอนต่อไปของเราก็คือ การใส่โค้ดให้กับโปรแกรมของเรา  ให้นักเรียนคลิกไปที่แท็บคำสั่ง View ของแถบเมนู  จากนั้นให้เลือกคำสั่งย่อย Code  หน้าต่างโค้ดก็จะปรากฏขึ้น  ใช่เลย เราจะป้อนซอร์สโค้ดโปรแกรมของเราตรงนี้แหละ

Click on the "View" command at the menu bar, then select "Code" subcommand
14  The first set of source codes is about the declarations. There will be the "(General)" at the left-top of the view-code window and the "(Declarations)" at the right-top. We have to type four lines of our following source codes.
ซอร์สโค้ดกลุ่มแรก เป็นโค้ดที่เกี่ยวข้องกับการประกาศตัวแปร  นักเรียนจะเห็นว่ามี (General) อยู่ที่หัวข้อด้านซ้าย  และ (Declarations) อยู่ที่หัวข้อด้านขวา

        1st Line is about the General Declaration  เป็นคำประกาศทั่วไป
        2nd Line is the Declaration of variable "StartTime"  ประกาศตัวแปรเพื่อรับค่าเวลาเริ่มต้น
        3rd Line is
the Declaration of variable "EndTime" ประกาศตัวแปรเพื่อรับค่าเวลาที่หยุด
        4th Line is the Declaration of variable "ElapsedTime"
ประกาศตัวแปรเพื่อรับค่าเวลาที่ใช้ไป
15  This step is about attaching our source code to a control object. The "cmdStart" is a command button we are going to attach the source code. Let's double click on this command button, yes, this action could bring us to a module or subprogram that could be driven by an event, _click ( ), that means this subprogram could work when this command button was clicked on.
ขั้น ตอนนี้ จะเป็นการผูกซอร์สโค้ดโปรแกรมของเราไว้กับปุ่มคำสั่ง cmdStart  ให้นักเรียนดับเบิลคลิกที่ปุ่มคำสั่งนี้ (เมื่อเราอยู่ในมุมมอง Object)  จากนั้นจะพาเราเข้าสู่ห้วงของโมดุลหรือโปรแกรมย่อย  ซึ่งโปรแกรมย่อยหรือโมดลที่ว่านี้ จะถูกขับเคลื่อนโดยเหตุการณ์ (event-driven)  ซึ่ง ณ ที่นี้ก็คือ " _click ( )" การคลิกเมาส์ของผู้ใช้โปรแกรมนั่นเอง 
 What is about this source code?  It begins with assigning the recent time value (Now) to the variable "StartTime".  Then the method "Caption" stipulates that the label "lblStart" can show up data from the variable "startTime" with the "hh:mm:ss:" format.
ซอร์ส โค้ดนี้มันคืออะไรหรือ?  โค้ดจะเริ่มจากการกำหนดให้ตัวแปร StartTime เอาค่า Now คือเวลาปัจจุบันไปเก็บไว้  ต่อจากนั้นโค้ดก็จะมีวิธีการ (Method) ที่ชื่อว่า Caption  เป็นตัวกำหนดรูปแบบการแสดงค่าของเวลา โดยเอาค่าที่เก็บไว้ในตัวแปร StartTime นั้นมาแสดงผลเวลาในเลเบิล lblStart
 
Attach code to the command button "cmdStart"
ผูกโค้ดเข้ากับปุ่มคำสั่ง "cmdStart"

16  This step is similar to the previous but it turns to the "cmdEnd" command button. But it creates the expression which assigns the variable "ElapsedTime" with the difference of the variable "EndTine" and the variable "StartTine".
ใน ขั้นตอนนี้ ก็คล้ายกับขั้นตอนที่ผ่านมา  แต่จะมีการสร้างนิพจน์คำนวณค่าส่วนต่างของเวลา ระหว่่างตัวแปร EndTime และตัวแปร StartTime และนำไปเก็บไว้ในตัวแปร ElapsedTime
 
Attach code to the command button "cmdEnd"
ผูกโค้ดเข้ากับปุ่มคำสั่ง "cmdEnd"

17  This is the end of application with the only amazing word "End"
Attach code to the command button "cmdExit"
ผูกโค้ดเข้ากับปุ่มคำสั่ง "cmdExit"


18  Congratulation to our tough project!. This is the output of our input and process. Yes, it is the "Stop Watch Application" of us.  
ขอ แสดงความยินดีกับโครงงานสุดหินนะนักเรียน  นี่คือผลที่ได้ จากการสร้างและป้อน  ประมวลผล  จนได้แอ็ปปลิเคชันนาฬิกาจับเวลา หน้าตาแบบนี้แหละน้า

Our Graphic User Interface Application :  "Stop Watch"
แอ็ปปลิเคชันของเราที่มีรูปแบบการติดต่อกับผู้ใช้เป็นกราฟิก (GUI)
19  We have to make our project to an independent application.  Click on the "File" command at the menubar then select the "Make..to..EXE" subcommand.  
เรา ต้องทำให้โปรเจ็กต์ (โครงงาน) ของเราที่รันได้แล้วนี้ ให้กลายเป็นแอ็ปปลิเคชันอิสระที่สามารถรันได้เอง (โดยที่ไม่ต้องอาศัย Visual Basic)  ทำได้โดยการคลิกคำสั่ง File  ณ แถบเมนูคำสั่ง  แล้วเลือกคำสั่งย่อย Make..to..EXE  เท่านี้ก็เสร็จเรียบร้อย

Visual Basic 6.0 : Exercise 2 " Pizza Order"

Teacher  Phaitoon  Yaemprasuan  :   occupatech@gmail.com
                                                                http://picta55.blogspot.com
Exercise 2

Pizza Order Application

 We had just learned about programming with Microsoft Visual Basic 6.0 and tried to create two Windows applications (using Visual Basic 6.0), the first one was "Stop Watch" and the second was "Calendar/Time".  Some people have told me, the teacher, that it is interesting and challenging, while some other people have never said any word but have just thought that it is boring. Yes, the teacher realizes that programming is so valuable because it can develop anyone both systematic thinking and solving. Well, the teacher knows  that anybody can never hand on it if he is not interested in programming. But, now the teaching is not over, the show must go on! 
พวกเราได้เรียนรู้เกี่ยวกับการโปรแกรมด้วยภาษาวิชวลเบสิก 6.0  และได้ลองพัฒนาแอ็ปปลิเคชันที่ทำงานในระบบวินโดวส์ 2 แอ็ป ด้วยกัน  โดยแอ็ปแรกเป็นนาฬิกาจับเวลา แอ็ปที่สองเป็นแอ็ปบอกวันเวลา  นักเรียนหลายคนก็บอกกับครูว่า "น่าสนใจและท้าทายมาก"  ขณะที่นักเรียนอีกหลายคนไม่พูดอะไรสักแอ่ะ...คิดอยู่อย่างเดียวว่า "มันน่าเบื่อ"   ใช่ เลย..ครูตระหนักดีอยู่เสมอว่า ความจริงแล้วนะ.. การเรียนรู้เรื่องการโปรแกรมมันมีคุณค่าในตัวของมันเองอยู่แล้ว  เพราะมันเป็นการพัฒนาผู้เรียนให้รู้จักการคิด/การแก้ปัญหาอย่างเป็นระบบ  ครู..ทราบดีว่า.. นักเรียนคนไหนก็ตามที่รู้สึกว่าตนเองไม่สนใจในเรื่องของการโปรแกรมแล้วละก็ คงยากนะที่จะเอาดีในเรื่องนี้ได้ ... แต่ช้าก่อน... การเรียนการสอนก็คงหยุดไม่ได้ ... ก็ต้องว่ากันต่อไป..


  "Pizza Order" Application
แอ็ปปลิเคชัน "สั่งพิซซ่า"

     SOURCE  :   www.kidwares.com

1. Start a new project.  We'll build a form where a pizza order can be entered by simply clicking on check boxes and option buttons.
ให้ นักเรียนเข้าไปที่หน้าจอหลักของ Microsoft Visual Basic 6.0 เหมือนที่เราเคยทำ ด้วยการเลือก Standard EXE เพื่อสร้าง New project .... อย่า ลืม Save นะ  ซึ่งการ Save ครั้งแรก จะเป็น Save As โดยนักเรียนต้อง Save ฟอร์มก่อน แล้วจึง save โปรเจ็กต์ ... เลือก Folder ให้เรียบร้อย  (เรื่องนี้ นักเรียนถูกย้ำมาจนเป็นทักษะดีอยู่แล้วจากครูผู้สอน)  ตอนนี้เรากำลังจะสร้างแอ็ปสั่งพิซซ่า  โดยผู้ใช้ก็แค่ทำการคลิกเลือกตัวเลือก และติ๊กรายการต่างๆ แล้วสั่งการผ่านปุ่มคำสั่ง..

2. Draw three frames.  In the first, draw three option buttons, in the second, draw two option buttons, and in the third, draw six check boxes.  Draw two option buttons on the form.  Add two command buttons.  Make things look something like this.
ให้ นักเรียนวาดเฟรม (frame) 3 เฟรม  แล้ววาดปุ่มอ็อปชัน (option button) ใส่ไว้ในเฟรมแรก 3 ปุ่ม  ส่วนเฟรมที่สองวาดปุ่มอ็อปชันใส่ไว้ 2 ปุ่ม  ส่วนเฟรมที่สามวาด check box ใส่ไว้ 6 ช่อง ด้วยกัน  แล้ววาดปุ่มอ็อปชันอีกสองปุ่มใส่ไว้ในฟอร์ม (ดูโซน 4 ประกอบ)  และวาด command button (ปุ่มคำสั่ง) สองปุ่ม (ไว้ในโซน 5)

Fig.1  The Form which is being designed by us.
นี่เป็นฟอร์มที่กำลังได้รับการออกแบบจากนักเรียน


3. Set the properties of the form and each control.
หลังจากออกแบบเสร็จแล้ว ต่อไปนักเรียนต้อง set the properties (ตั้งค่าคุณสมบัติ) ของฟอร์ม และคอนโทรล (control )แต่ละตัว  ดังนี้


  • Form1:
    BorderStyle    1-Fixed Single
    Caption          Pizza Order
    Name            frmPizza
  • Frame1:
    Caption    Size

  • Frame2:
    Caption    Crust Type

  • Frame3
    Caption    Toppings


  • Option1:
    Caption    Small
    Name      optSize
    Value      True

  • Option2:
    Caption    Medium
    Name      optSize (yes, create a control array)

  • Option3:
    Caption    Large
    Name      optSize

  • Option4:
    Caption    Thin Crust
    Name       optCrust
    Value       True

  • Option5:
    Caption    Thick Crust
    Name       optCrust (yes, create a control array)

  • Option6:
    Caption    Eat In
    Name    optWhere
    Value    True

  • Option7:
    Caption    Take Out
    Name       optWhere (yes, create a control array)

  • Check1:
    Caption    Extra Cheese
    Name      chkTop

  • Check2:
    Caption    Mushrooms
    Name       chkTop (yes, create a control array)

  • Check3:
    Caption    Black Olives
    Name       chkTop


  • Check4:
    Caption    Onions
    Name      chkTop

  • Check5:
    Caption    Green Peppers
    Name      chkTop

  • Check6:
    Caption    Tomatoes
    Name      chkTop

  • Command1:
    Caption    &Build Pizza
    Name      cmdBuild

  • Command2:
    Caption    E&xit
    Name      cmdExit


4. Declare the following variables in the general declarations area:
ให้นักเรียนเลือก View/Code   แล้วพิมพ์ Source codes ในส่วนของ  general declarations (ส่วนประกาศทั่วไป)     เพื่อประกาศตัวแปร (to declare the variables) 3 ตัว เป็นตัวแปรชนิด String (เก็บข้อมูลที่เป็นข้อความ)  ได้แก่  PizzaSize (เก็บข้อมูลขนาดของพิซซ่าที่ลูกค้าสั่ง),  PizzaCrust (เก็บข้อมูลว่า ลูกค้าสั่งพิซซ่าที่มีขอบบางหรือหนา),   PizzaWhere (เก็บข้อมูลว่า พิซซ่าที่ลูกค้าสั่งนั้น จะกินที่ร้าน หรือแพ็กห่อ)

    Option Explicit
      Dim PizzaSize As String
      Dim PizzaCrust As String
      Dim PizzaWhere As String


5. Attach this code to the Form_Load procedure.  This initializes the pizza size, crust, and eating location.
ให้นักเรียนผูกโค้ด (attach code) เข้ากับฟอร์ม  (โดยการทำดับเบิลคลิกที่ฟอร์ม  ก็จะเข้าสู่โมดูล หรือโพรซิเยอร์ (procedure) ที่ชื่อ Form_Load แล้วนักเรียนก็ใส่โค้ดเข้าไป  บรรดาโค้ดตรงนี้ จะเป็นการกำหนดค่าเริ่มต้น (initialization) ให้กับตัวแปรทั้งสามตัว ที่เราประกาศไว้ คือ PizzaSize, PizzaCrust และ PizzaWhere

Private Sub Form_Load()
  PizzaSize = "Small"
  PizzaCrust = "Thin Crust"
  PizzaWhere = "Eat In"
End Sub


6.  Attach this code to the three option button array Click events.  Note the use of the Index variable:
ให้นักเรียน attach code เข้ากับปุ่มอ็อปชันในแต่ละเฟรม (โดยดับเบิลคลิกที่ปุ่มอ็อปชันใดๆ ในเฟรมนั้น แล้วใส่โค้ด)


Private Sub optSize_Click(Index As Integer)
[ดับเบิลคลิกที่ปุ่ม optSize (ใดก็ได้ในสามปุ่ม ของโซน 1) แล้วใส่โค้ดข้างล่างนี้เข้าไป ]
  PizzaSize = optSize(Index).Caption
  (โค้ดนี้ จะให้อ่านค่า จำนวนเต็ม 0, 1 หรือ 2 ซึ่งแทนขนาดเล็ก กลาง ใหญ่  ของขนาดถาดพิซซ่า เอาค่าไปเก็บไว้ในตัวแปร PizzaSize)
End Sub

Private Sub optCrust_Click(Index As Integer)
[ดับเบิลคลิกที่ปุ่ม optCrust (ใดก็ได้ในสองปุ่ม ของโซน 2) แล้วใส่โค้ดข้างล่างนี้เข้าไป ] 
  PizzaCrust = optCrust(Index).Caption
  (โค้ดนี้ จะให้อ่านค่า จำนวนเต็ม 0 หรือ 1 ซึ่งแทนขอบพิซซ่า อย่างบาง หรืออย่างหนา  เอาค่าไปเก็บไว้ในตัวแปร PizzaCrust)
End Sub


Private Sub optWhere_Click(Index As Integer)
[ดับเบิลคลิกที่ปุ่ม optWhere (ใดก็ได้ในสองปุ่ม ของโซน 4) แล้วใส่โค้ดข้างล่างนี้เข้าไป ] 
   PizzaWhere = optWhere(Index).Caption
    (โค้ด นี้ จะให้อ่านค่า จำนวนเต็ม 0 หรือ 1 ซึ่งแทนว่าจะกินพิซซ่าที่ไหน กินที่ร้าน หรือนำกลับบ้าน  เอาค่าไปเก็บไว้ในตัวแปร PizzaWhere)
End Sub


7. Attach this code to the cmdBuild_Click event.
ให้นักเรียน attach code ต่อไปนี้  เข้าไปที่ปุ่มคำสั่ง cmdBuild

Private Sub cmdBuild_Click()
  Dim Message As String
  Dim I As Integer
  Message = PizzaWhere + vbCr
  Message = Message + PizzaSize + " Pizza" + vbCr
  Message = Message + PizzaCrust + vbCr
        For I = 0 To 5
  If chkTop(I).Value = vbChecked Then Message = Message + chkTop(I).Caption + vbCr
      Next I
      MsgBox Message, vbOKOnly, "Your Pizza"
End Sub


This code forms the first part of a message for a message box by integrating the pizza size, crust type, and eating location (vbCr is a symbolic constant representing a ‘carriage return’ that puts each piece of ordering information on a separate line).  Next, the code cycles through the six topping check boxes and adds any checked information to the message.  The code then displays the pizza order in a message box.
โค้ดในส่วนนี้ จะทำการสร้าง message ในลักษณะของ message box  ที่จะบูรณาการเอา ขนาดของพิซซ่า  ขอบหนาหรือบาง และจะกินที่ร้านหรือแพ็กกล่อง (vbCr คือ symbolic constant หรือค่าคงที่ ในภาษาวิชวลเบสิกที่หมายถึงการสั่งให้ขึ้นบรรทัดใหม่ หรือ carriage return ก็คือ "การปัดแคร่" ซึ่งขอยืมศัพท์ของพิมพ์ดีดมาอีกทีนั่นเอง)


8.  Attach this code to the cmdExit_Click event.
ผูกคำสั่ง End เข้ากับปุ่มคำสั่ง cmdExit
Private Sub cmdExit_Click()
  End
End Sub


9.  Run the application, the message box will be appeared.
เมื่อรันโปรแกรม ก็จะได้ application ที่มี user interface แบบนี้


The Application User Interface
นี่คือหน้าตาของแอ็ปปลิเคชันของเรา


Message Box
เม็ซเสซบ็อกซ์ที่ได้

10 projects on the future of Google

Google X   สุดยอดโครงการในอนาคตของกูเกิล


                                  Teacher  Phaitoon  Yaemprasuan      : http://picta55.blogspot,com

         SOURCE  :  http://bigpicture.ru                                      


As you know, Google - is not only a search engine: The company is a world leader in the creation of gadgets, internet services, and more. The most curious development team is engaged in a secret Google X, and among their projects -  here are 10 ideas that the Internet giant seeks to bring to life.
ก็ อย่างที่เราทราบกันดีว่า Google ไม่ใช่เพียงแค่ Search Engine (เว็บไซต์ให้บริการสืบค้นข้อมูล)  แต่เป็นบริษัทยักษ์ใหญ่ที่สร้างสรรค์ Gadgets (อุปกรณ์อิเล็กทรอนิกส์ขนาดเล็ก)  การให้บริการต่างๆ ผ่านเครือข่ายอินเทอร์เน็ต ฯลฯ   แต่ตอนนี้ทีมงานพัฒนาสุดเทพ (the most curious development team) ของพวกเขา  กำลังซุ่มทำโครงการลับ Google X (x คือ 10 ตามเลขโรมันนั่นแหละ)


googlefuture01 10 проектов будущего от Google
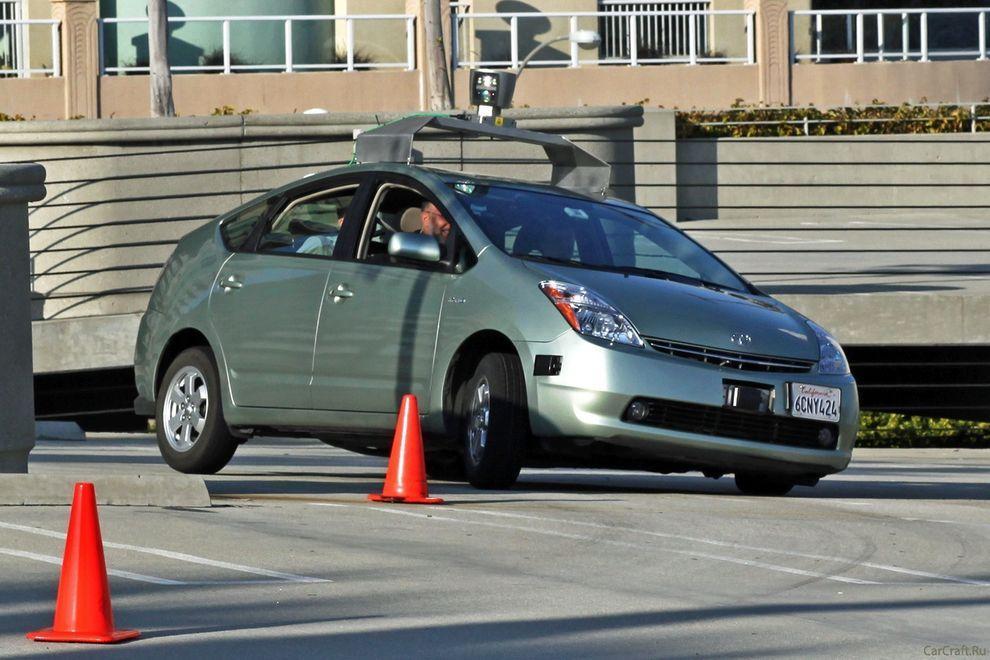
1. Car without a driver will make road traffic safer
Experts of Google X for several years working on the project Driverless Car Program.
Negotiations are underway with the authorities for permission to test the self-governing vehicles on public roads - as long as this agreement only states of California and Nevada.
A fleet of ten vehicles with test systems allow run over more than 480 thousand km (as of August of 2012), and of course, tests are continuing. However, it is unclear when such a system will be commercially available.

โครงการขั้นเทพแรกสุดของเจ้าพ่ออินเทอร์เน็ตรายนี้ก็คือ รถยนต์ไร้คนขับ   กูเกิลต้องไปเจรจาขออนุญาตจากทางการ
(negotiations are underway with the authorities for permission) ที่จะทดสอบรถยนต์ที่มันควบคุมตัวมันเองได้  (to test the self-governing vehicles)  บนถนนหลวง (on public roads)  ของสองมลรัฐเท่านั้น คือ มลรัฐแคลิฟอร์เนีย (แค่รัฐนี้ก็มีพื้นที่ใหญ่กว่าประเทศไทยแล้ว)  กับมลรัฐเนวาดา  (ก็ อย่างว่าแหละ ถนนในสองมลรัฐนี้มันวิ่งผ่านทะเลทรายซะเป็นส่วนใหญ่ การจราจรบนถนนมันจึงเบาบาง จึงเหมาะกับการทดสอบรถยนต์อัจฉริยะของกูเกิลเขาล่ะนะ)   ตอน นี้พวกหมู่เขาชาวกูเกิลก็เลือกเอารถยนต์รักษ์โลก Toyota Prius สุดยอดรถยนต์ลูกผสม (Hybrid) อันโด่งดังของค่ายรถยนต์ยักษ์ใหญ่ของโลก (ขณะ นี้ Toyota เป็นกลุ่มยานยนต์ที่มียอดการขายรวมสูงสุดเป็นอันดับ 1 ของโลกไปแล้ว  จากรถยนต์ในกลุ่มหลายแบรนด์ คือ Toyota, Hino, Dihatsu, Lexus)  มาทำการทดสอบระบบนี้อยู่  มีรถยนต์ที่ทดสอบระบบนี้นับสิบคัน  ต้องวิ่งยาวๆ เกือบ 5 แสนกิโลเมตร  เลยทีเดียว


googlefuture02 10 проектов будущего от Google
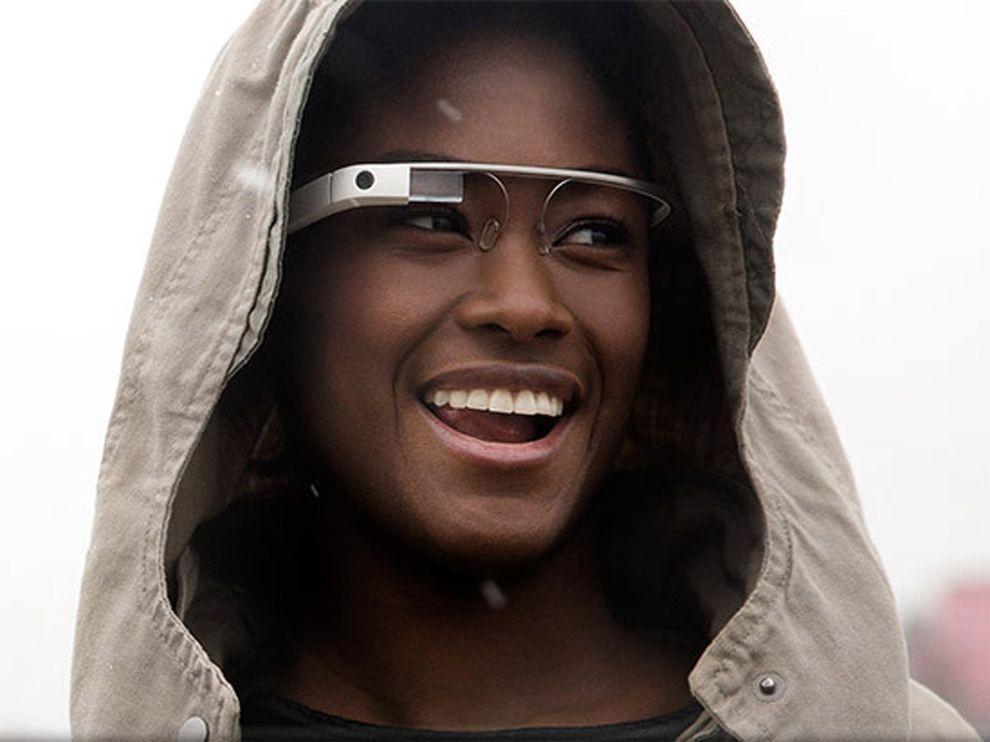
2. Google Glass will change the way you think about gadgets
Having put on those glasses, you can forget about the screens of smartphones and computers - the right information will always be available in only one eye movements.
One way to look up - and before you calendar, email, social networks, weather, in general, everything that you want.
Google Glass makes a revolutionary technology available to a wide range of people so far only a few lucky people, mostly developers and journalists were able to get a working prototype of points, but the consumers opportunity arises next year.

แว่นตาวิเศษของกูเกิล
 คือถ้าลองได้สวมแว่นตาสุดเทพนี้ละก็  เห็นท่าว่าเราคงจะลืมหน้าจอของสมาร์ตโฟน (ที่เราว่าเจ๋งแล้วนา) และหน้าจอคอมพิวเตอร์สุดโปรดของเราไปเลย  คือ ข้อมูลข่าวสารทั้งหลายที่เราอยากจะรู้  อาทิ วันเวลา  อีเมล์  สภาพอากาศ  แม้แต่สื่อสังคอมออนไลน์ (อาทิ facebook)  มันจะเผยโฉมให้เราเห็นได้ เพียงแค่เรากระดิกพลิกตาเราเท่านั้นแหละ (หวังว่ากูเกิ้ลคงไม่ได้โม้นะ) 


googlefuture03 10 проектов будущего от Google
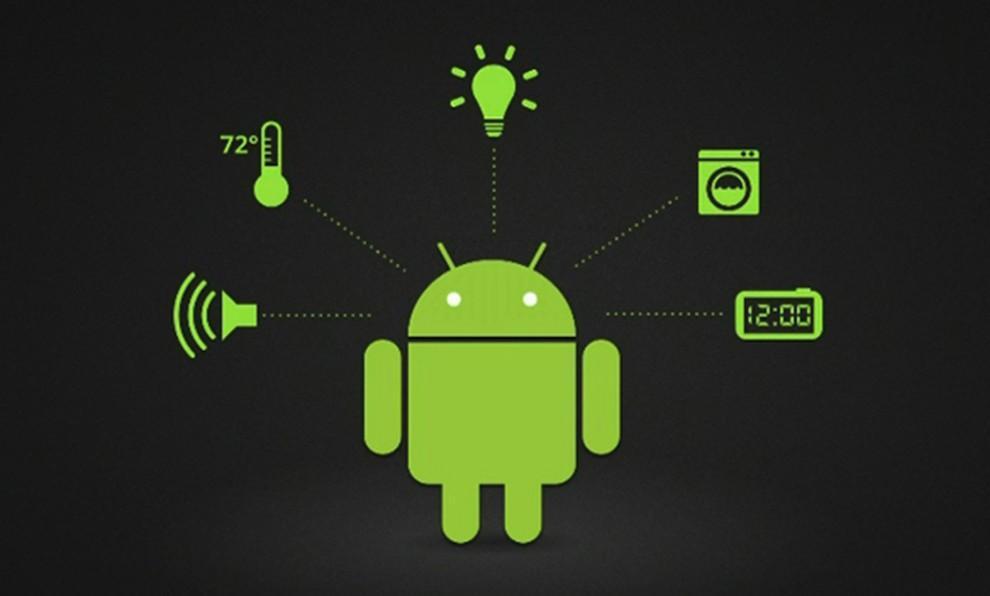
3. "Smart House" according to Google
The technology, called Android @ Home, will fully automate all of the life support system by connecting to the Internet, for example, while you are not home, a refrigerator will be able to order the necessary products itself, and coffee maker to make coffee exactly to your arrival.
Android @ Home will connect all electrical appliances.

บ้านอัจฉริยะ
 
ในแนวคิดของกูเกิ้ล  เทคโนโลยีนี้เรียกว่า 
Android @ Home  ซึ่งจะเนรมิตให้บ้านกลายเป็นบ้านอัตโนมัติ ด้วยการเชื่อมต่อกับอินเทอร์เน็ต  ยกตัวอย่าง  ขณะที่เราไม่อยู่บ้าน ตู้เย็นในบ้านเรามันสามารถจะสั่งของกินเอาไว้ให้เราได้เอง  และเครื่องชงกาแฟมันก็ชงกาแฟไว้คอยท่าเราตอนกลับบ้าน   ระบบแอนดรอยด์@โฮมที่ว่า มันจะเชื่อมต่อกับเครื่องใช้ไฟฟ้าทั้งหลายแหล่ในบ้าน


googlefuture04 10 проектов будущего от Google
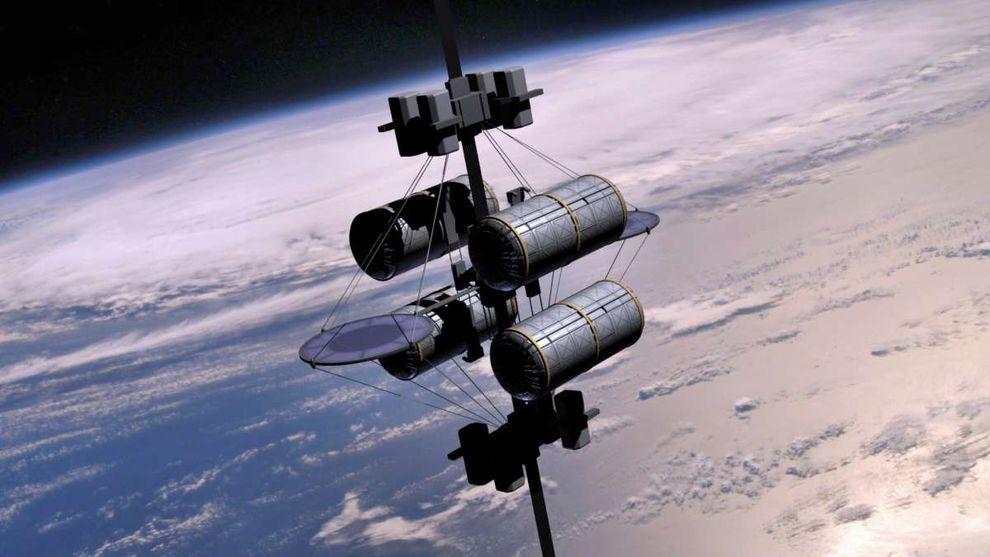
4. Space elevator
According to published in the journal «Time» information Google X team in 2011, the year included the idea of ​​a "space elevator" in the so-called list of "What if ...". I must say, the very concept of this method of delivery to the orbit of people and goods put forward by K. Tsiolkovsky in 1895, the year.
Do not wait for Google's early implementation of this idea - the development of "lift into orbit," presents many technical challenges, and all the more likely to say that to implement this idea in life is impossible. However, it's probably Google thus "cover their tracks" to save the process of developing a secret.

ลิฟต์อวกาศ
 
เป็นแนวคิดที่จะส่งอะไรต่อมิอะไรไปไว้ในอวกาศ (the very concept of this method of delivery to the orbit of people and goods) ซึ่งถ้าจะว่าไป ก็คงเป็นข้อมูลข่าวสารนั่นแหละ เพราะเมื่อมันอยู่ในอวกาศได้ โอกาสที่มนุษย์ธรรมดาจะไปล้วง ไปเจาะ ไปแฮ็กข้อมูล มันก็คงจะยากขึ้นอ่ะนะ

 
googlefuture05 10 проектов будущего от Google
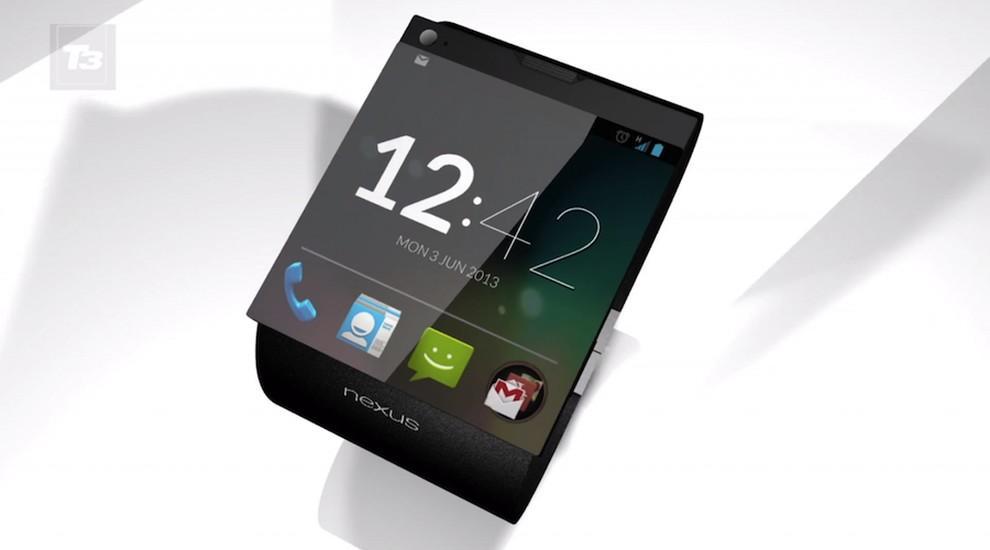
5. Watch a smartphone based on Android
Recently, it was reported that Google is preparing a direct competitor iWatch from Apple - a watch, combined with the smartphone: of course, watches SmartWatch smartphone from Google will use the operating system Android.
This latest «must have»-new to the gadget lovers will be available early next year.

นาฬิกาอัจฉริยะ
 
SmartWatch  ที่รวมเอา smartphone กับนาฬิกา มาไว้ด้วยกัน  แล้วใช้ระบบปฏิบัติการ Android  ก็คือคู่แข่งของ iWatch จากค่าย Apple นั่นแหละ 

 
googlefuture06 10 проектов будущего от Google
6. Google will take care of your health
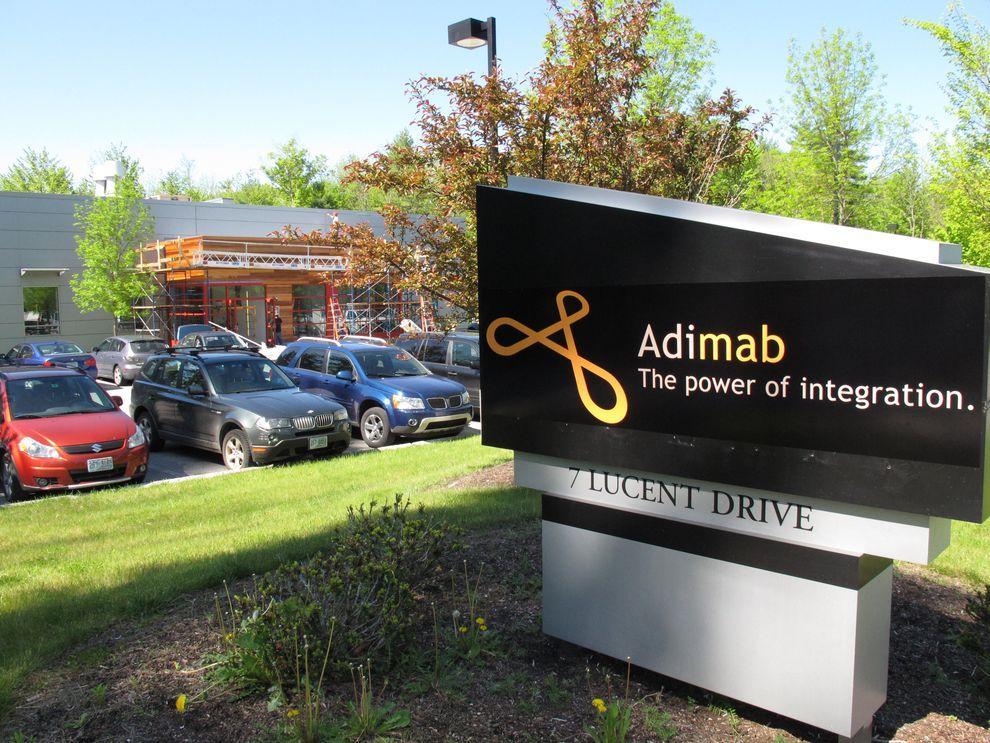
The Internet giant has a stake in the company Adimab, engaged in the development of diagnostics and treatment of various diseases, which would bring a variety of technologies and methods to combat diseases. The revolutionary idea is the invention of miniature sensors involved in the search and optimization of antibodies produced by the body - to start treatment only need to swallow such a sensor.
Another development in the field of Google Health is a subsidiary of iPierian, creating the technology of "cellular reprogramming» (cellular reprogramming), which will fight the disease by modifying cells.
 Google เพื่อสุขภาพ   กูเกิลเข้าไปถือหุ้นในบริษัท Adimab  ที่ทำธุรกิจเกี่ยวกับการพัฒนาและวิจัยเกี่ยวกับการตรวจและรักษาโรคต่างๆ  แนวคิดก็คือ การประดิษฐ์ miniature sensors (ตัว ตรวจจับขนาดจิ๋ว) ที่จะตรวจหาและปรับสารแอนติบอดีในร่างกายคน  เพื่อเริ่มการรักษา เพียงแค่กลืนตัวเซนเซอร์ที่ว่านี้เข้าไปแค่นั้น (to start treatment only need to swallow such a sensor)  นอกจากนี้กูเกิลยังจะพัฒนา Cellular reprogramming  (การโปรแกรมใหม่ให้เซล)  ซึ่งจะช่วยต่อต้านโรคร้ายได้ ด้วยการปรับแต่งเซลใหม่

  
googlefuture07 10 проектов будущего от Google
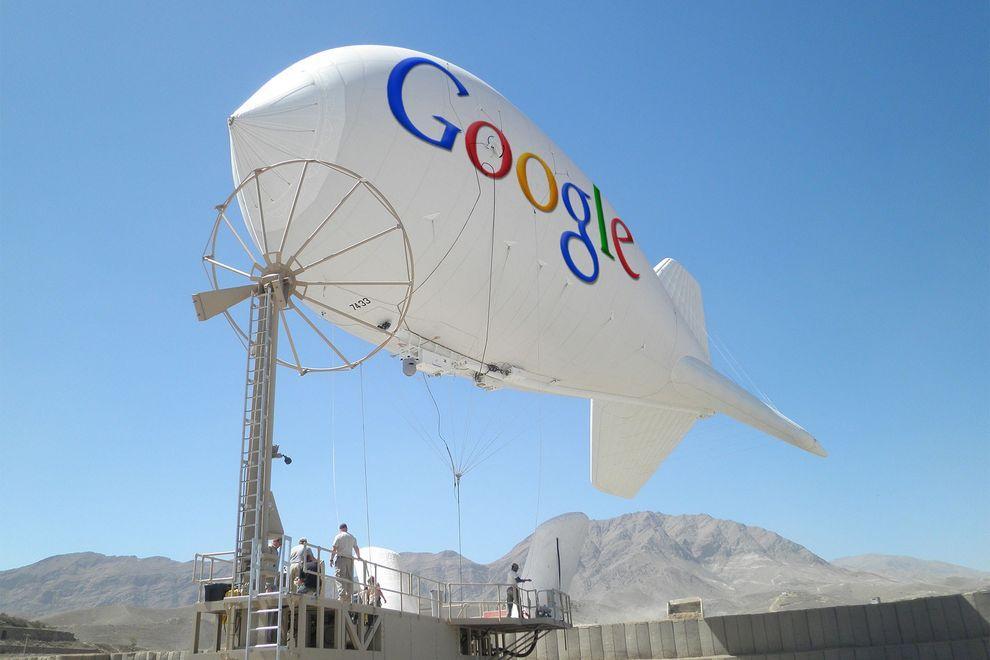
7. Internet airships cover the entire planet wireless
Google's ambitions as a provider of Internet reached all-time highs - the company is developing airships that will provide wireless connectivity the entire planet, including remote regions in Africa and other parts of the Earth.
If the project is realized, the "world wide web" will get about another 1 billion people - mostly residents of the "third world."
 
ยานอินเทอร์เน็ต
   เพื่อจะทำการส่งสัญญาณอินเทอร์เน็ตแบบไร้สายไปให้โลกทั้งใบ  ไม่ว่าจะอยู่ส่วนไหนในโลก  อาทิ ดินแดนที่ห่างไกลในทวีปแอฟริกา  ก็สามารถเข้าถึงอินเทอร์เน็ตได้


googlefuture08 10 проектов будущего от Google
8. Game console based on Android
The popularity of the Android platform is growing all over the world, and Google is seeking to use its potential to the maximum.
«Wall Street Journal» spoke about the development of the gaming console from Google, which is designed to be a "killer" similar technology "Yabloko» - Apple TV: game console from Google allows you to run any Android-games directly on your home television.

เกมคอนโซลในระบบแอนดรอยด์   
แพ ล็ตฟอร์มแอนดรอยด์มาแรงแซงเวอร์ไปทั่วโลกแล้ว  ยักษ์กูเกิลก็จะยิ่งดันให้มันแรงสุดๆ ไปเลย ด้วยการสร้างเกมคอนโซลที่สามารถรันได้จากสมาร์ตทีวี (ตอนนี้ประเทศไทยยังไม่มีอ่ะนะ ทีวีอัจฉริยะแบบที่ว่า)

 
googlefuture09 10 проектов будущего от Google
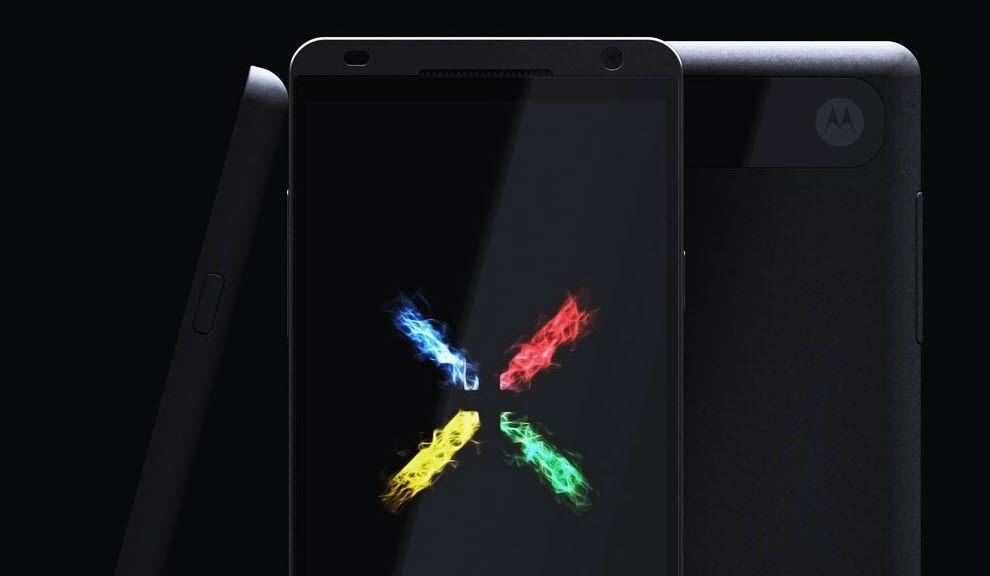
9. The way Google determines the development of smart phones Motorola
Buy Google of Motorola Mobility (transaction was $ 12.5 billion) to become the owner of the first allowed 24.5 thousand patents and designs.
Under the wing of the Internet giant will release a smartphone Motorola Moto X based on Android, which has all the modern features and characteristics, as well as, of course, a number of trendy "chips", which has no rivals - release date already quite close.
 Moto X สมาร์ตโฟน   กูเกิลไปจับมือกับค่าย Motorola สร้างสมาร์ตโฟน Moto X ที่รันบนระบบแอนดรอยด์  โดยกะว่า จะมีศักยภาพไร้เทียมทานกว่าใครใคร
 
googlefuture10 10 проектов будущего от Google
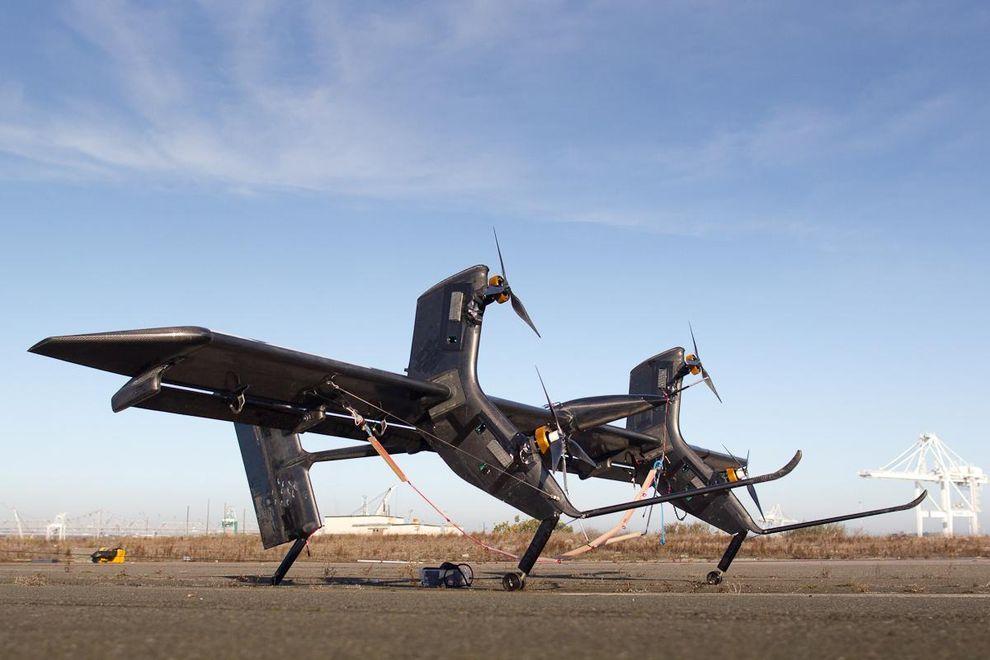
10. Eco-friendly sources of energy
The company Makani Power - developer of advanced technologies in the use of wind and solar energy: Google previously invested in the company a lot of money, and recently acquired in its entirety and included in the project, which deals with Google X.
The best-known development Makani Power - wind turbines, hovering at an altitude of almost 300 m to 650 m-minute and allow to generate electricity out of thin air.

 
แหล่งกำเนิดพลังงานที่เป็นมิตรกับสิ่งแวดล้อม   ใช้เทคโนโลยีก้าวหน้าจากพลังงานลม และพลังงานแสงอาทิตย์  กูเกิลกับพันธมิตรลงทุนไปหลายตังค์ในการพัฒนา 

วันอาทิตย์ที่ 7 กรกฎาคม พ.ศ. 2556

My profile

My name is Natthanon Ngachaiyaphum M.2/8 No.8

My nickname is Top

i was born in the 20th January, 2000

I'm 13 years old

Old School is the Maephraprajak school

My favorite color is Black and Blue

I have one brother

My address is 597 Moo.10,Thung khok,Song Phi Nong,Suphan Buri

Computer Network เครือข่ายคอมพิวเตอร์


TEACHER :  Phaitoon  Yaemprasuan    :  occupatech@gmail.com
                  http://picta55.blogspot.com


What is Computer Network? Why?

If any computer is not connected to others it is called "a stand-alone machine".  Today if anyone uses any stand-alone machine , he must be considered a stranger because the world today is of computer networks. A network machine can send/receive packets (bits of data per second) to/from any other machines e.g. Internet.  Our computers/tablet PCs/smart phones can never be alone anymore. Yes, they have been connected to their networks both local (e.g. the networks in our school) and global (e.g. Internet). We can share our resources such as  files, printers etc. to each other through our local area network (LAN) or we can exchange our data through the wide area network (WAN) like Internet.

เครือข่ายคอมพิวเตอร์คืออะไร? ทำไม?

ถ้าหากคอมพิวเตอร์เครื่องไหนไม่ได้เชื่อมต่อกับใคร มันจะถูกเรียกว่า "เครื่องที่โดดเดี่ยว" และถ้ามีคนใช้เครื่องคอมพิวเตอร์แบบนั้น ก็จะถูกมองว่าเพี้ยนหรือเปล่า?  เพราะโลกทุกวันนี้ได้กลายเป็นโลกของเครือข่ายคอมพิวเตอร์ไปเรียบร้อยแล้ว  เครืองคอมพิวเตอร์ที่เชื่อมต่อกับเครือข่าย จะสามารถส่ง/รับข้อมูล ไปสู่/จากเครื่องอื่นๆ  เช่น  อินเทอร์เน็ต  เครื่องคอมพิวเตอร์/แท็บเล็ต/สมาร์ตโฟน ของเรา จึงไม่อาจอยู่ได้อย่างเดียวดายอีกต่อไป  เพราะมันจักต้องถูกเชื่อมต่อเข้ากับระบบเครือข่าย  ทั้งเครือข่ายท้องถิ่น (เช่น เครือข่ายภายในโรงเรียนของเรา)  และเครือข่ายระดับโลก (เช่น อินเทอร์เน็ต)  เรายังสามารถแบ่งปันทรัพยากร อาทิ  ไฟล์ เครื่องพิมพ์  ให้กันและกันในเครือข่าย ผ่านระบบเครือข่ายเฉาะที่ (แลน) หรือเราสามารถแลกเปลี่ยนข้อมูลผ่านระบบเครือข่ายวงกว้างอย่างอินเทอร์เน็ต ได้ด้วย


Figure 1   What is Computer Network  เครือข่ายคอมพิวเตอร์คืออะไร

Figure 2  Computer Network classified by Area Width
เครือข่ายคอมพิวเตอร์ จำแนกตามขนาดของพิ้นที่


Figure 3  Types of Network Topology
รูปแบบการเชื่อมต่อของเครือข่าย


Figure 4   Star/Extended Star Topology
รูปแบบการเชื่มต่อแบบสตาร์ และแบบสตาร์หลายๆ กลุ่ม

Figure 5   The Server-Client Network What/How
เครือข่ายคอมพิวเตอร์แบบ แม่ข่าย-ลูกข่าย

::      ::      ::

What/How of the Network in Comp102 Classroom?

เครือข่ายคอมพิวเตอร์ ห้องเรียนคอมพ์102 เป็นแบบไหน/อย่างไร


Because the operating software (OS) of all computers in classroom-102 is Windows7, so any students who use them, those machines, should better understand how they work, especially how to use the network of them.

เพราะซอฟต์ แวร์ระบบปฏิบัติการ (โอเอส) ของคอมพิวเตอร์ทุกเครื่องในห้องเรียน 102 คือ Windows7 ดังนั้นนักเรียนก็น่าจะต้องรู้ว่า มันมีวิธีการทำงานอย่างไร โดยเฉพาะระบบเครือข่าย 
 Our computers in comp102 classroom are connected together with the UTP (unshielded twisted pair) cables. Why? Because the unshielded cables are lower cost than the shielded cables which have been used in the signal noisy areas e.g.  airports, factories, etc. The style of their connection is "Star Topology" which each machine has its own cable which connects directly to the hub/switch.  A hub/switch is the center point of cables (both devices are similar to each other but a switch is more clever than a hub) . Well our network is called Local Area Network (LAN). Any LAN must has its workgroup name which required by the Operating System (OS) of each computer, Windows7 . But the administrator (the teacher) of this LAN  named it "comp2" workgroup. 

เครื่อ งคอมพิวเตอร์ในห้องเรียน 102 เชื่อมต่อด้วยสายเครือข่ายแบบ สายคู่บิดเกลียวไม่หุ้มฉนวน หรือสายยูทีพี ทำไมต้องเป็นสายแบบนี้?  เพราะราคาสายแบบนี้มันถูกกว่า สายเคเบิลแบบหุ้มฉนวน ที่ใช้กันในพื้นที่ที่มีการรบกวนสัญญาณมาก เช่น โรงงานในนิคมอุตสาหกรรม  ท่าเรือ ท่าอากาศยาน ฯลฯ และการที่ต้องบิดเป็นเกลียวก็เพื่อให้ป้องกันการรบกวนสัญญาณนั่นเอง  ซึ่งรูปแบบหรือโทโพโลยีของการต่อระบบแลน จะเป็นแบบสตาร์โทโพโลยี  นั่น คือเครื่องทุกเครื่องก็จะมีสายเคเบิลเป็นของตนเองไปโยงกับฮับ/สวิตช์ ที่ถือว่าเป็นจุดรวมศูนย์ของสายเคเบิลนั่นเอง (ทั้งสองอุปกรณ์ทำหน้าที่เหมือนกัน แต่สวิตช์จะมีความสามารถในการจัดการมากกว่า เช่น สายใดที่ไม่มีการเชื่อมต่อ สวิตช์มันก็จะตัดออกจากระบบ เป็นต้น)  ระบบเครือข่ายของเราเรียกว่า แลน  โดยแลนแต่ละวงจะต้องมีการกำหนดชื่อ เวิร์กกรุ๊ป ซึ่งของห้องเรียน 102 ครูผู้สอนกำหนดชื่อว่า comp2

The Teacher Teaches About Programming Using C-Language in Comp102 Classroom
ครูผู้สอน ขณะกำลังสอนเกี่ยวกับการโปรแกรมด้วยภาษาซี ณ ห้องเรียนคอมพ์102


::      ::      ::


If we consider only the "comp2-workgroup LAN", it is a peer-to-peer network that every machine is independent from each other but shares its files/folders/printers to its peers. On the other hand, when this workgroup connects to the server computer of "the School Media Center", it must be a client-server network. 

ถ้าพิจารณาเฉพาะเครือข่ายห้องเรียนคอมพ์102 มันจัดว่าเป็น เครือข่ายแบบ-เพื่อน-ถึง-เพื่อน หรือ peer-to-peer  นั่นหมายถึงว่า คอมพิวเตอร์แต่ละเครืองในวงแลนจะเป็นอิสระจากกันและกัน เพียงแต่มาร่วมกลุ่มกันแบบถ้อยทีถ้อยอาศัยกันในหมู่เพื่อนแค่นั้น  ในอีกทางหนึ่ง หากนำเอาวงแลนนี้ไปต่อเชื่อมกับเครื่องคอมพิวเตอร์แม่ข่าย หรือ server computer ที่อยู่ในห้องศูนย์สื่อ ของโรงเรียน  เครือข่ายก็จะกลายเป็นแบบ "แม่ข่าย-ลูกข่าย" หรือ Server-Client Network

What is about the client-server network? It means that the server computer of "the Media Center" is the manager/boss of other computers which are only the clients. The server computer has been installed with the operating-software-for-server such as Windows2003server/Windows2008server , Linux or  Unix, which can manage the client computers of the network. The clients have to obey the server because the latter has the power to control/ban the former. Yes, the clients can never control/manage the server.
 เครือข่ายแบบ Server-Client Network เป็นแบบใด? ก็หมายความว่า เครื่องคอมพิวเตอร์แม่ข่าย (Server) ของศูนย์สื่อคือ ผู้จัดการ/นาย ของเครื่องอืนๆ ที่มีสถานะเป็นแค่ลูกน้อง หรือClient แค่นั้น  การที่เครื่องเซิร์ฟเวอร์สามารถบริหารจัดการเครืองลูกข่ายของมันได้นั้น เพราะมันได้ติดตั้งซอฟต์แวร์ระบบปฏิบัติการแบบแม่ข่ายเอาไว้นั่นเอง อาทิ Windows2003server/Windows2008server , Linux หรือ  Unix ซึ่งเครื่องลูกข่ายจะ ต้องยอมให้ตนเองถูกจัดการได้ เพราะซอฟต์แวร์ระบบของเครื่องแม่ข่ายสามารถควบคุม/สั่งแบน เครื่องอื่นๆ ได้  ในขณะที่เครื่องอื่นๆ ไม่สามารถบริหารจัดการเครื่องเซิร์ฟเวอร์ได้นั่นเอง  

The Common Personal Computer that was installed with the Linux Server Operating System.
เครื่องพีซีบ้านๆ ที่เอามาทำเป็นเครื่องเซิร์ฟเวอร์  โดยนำมาติดตั้งระบบปฏิบัติการลีนิกซ์สำหรับเครื่องข่าย
Every machine in the network is required to have its unique "hostname" and "IP address".  Only the server computer has the "static IP-address" while the IP addresses of the client computers are "dynamic" specified/controlled by the sever. If the user of any client computer specify the static IP address himself, the server computer can never share the Internet connection because the "IP address conflict" problem could be occurred easily. Then the alien client will be kicked off /faded away from the network simultaneously. Yes, the server computer is the "Internet gateway" of the network.

คอม พิวเตอร์ทุกเครื่องต้องมีชื่อเฉพาะตัวที่ไม่ซ้ำใคร เรียกว่า Hostname  และต้องมีรหัสหมายเลขเครื่องกำกับไว้ เรียกว่า IP-address  และในเครือข่ายแลนก็จะมีแค่เพียงเครื่องแม่ข่ายหรือเซิร์ฟเวอร์เท้านั้น ที่มีรหัสไอพีแอสเดรสแบบคงที่ เรียกว่ามี static IP-address   ขณะที่ไอพีแอสเดรสของคอมพิวเตอร์ลูกข่ายทั้งหลาย จะไม่คงที่ หรือDynamic  ส่วนจะเป็นรหัสไอพีอะไรนั้น เครื่องเซิรฟเวอร์จะเป็นตัวจัดการให้เอง โดยยึดหลัก FIFO (First In, First Out) ก็หมายความว่า เครื่องลูกข่ายตัวไหนเชื่อมต่อกับเครื่องเซิร์ฟเวอร์ก่อนก็จะๆด้รับการจ่าย รหัสไอพีให้ก่อน-หลัง ตามลำดับไป  แต่ถ้าเครื่องคอมพิวเตอร์ลูกข่ายตัวไหนไปดำเนินการกำหนดรหัสไอพีแอสเดรสของ ตัวเองเป็นแบบคงที่ละก็ คอมพิวเตอร์เครื่องนั้นๆ ก็จะถูกเครื่องเซิร์ฟเวอร์เฉดหัวออกไปจากระบบ มิเช่นนั้นอาจจะทำให้เกิดปัญหารหัสไอพีชนกันได้ในระบบ และเครื่องเซิร์ฟเวอร์ในฐานะเกตเวย์หรือทางออกสู่อินเทอร์เน็ตของระบบ ก็จะไม่ยอมแบ่งปันการเชื่อมต่ออินเทอร์เน็ตให้กับเครื่องนั้นๆ 

OK., after selecting the "Local Area Network" option, the "Local Area Network Connection Status" window appears. You can see its speed of packets transmission (100 Mbps) , bytes of the sent/received packets. 

หลังจากที่นักเรียนเลือก  "Local Area Network" หน้าต่างที่ชื่อ "Local Area Network 
Connection Status" ก็จะโผล่หน้ามาให้ยล ตรงนี้แหละนักเรียนก็จะเห็นได้ว่า ความเร็วของเครือข่ายเราขนาดไหนในการส่งแพ็คเก็ตส์ (จำนวนบิตของข้อมูลในหน่วยวินาที) ความเร็วระดับมดวิ่งนั่นแหละ แค่สัก 100 ล้านบิตต่อวินาที อย่าลืมว่า ตั้ง 8 บิต จึงจะได้ไบต์


Then, when you click on the "Properties" button, another window shows. To find and select the "Internet Protocol Version) option, you can see its IPaddress has been obtained automatically by the gateway/server computer (of the School Media Center).

ต่อ จากนั้นเราก็คลิกปุ่ม properties เราจะพบว่า เครื่องลูกข่ายที่เราใช้อยู่ จะถูกจ่ายรหัสไอพีให้แบบอัตโนมัติ ตามที่กล่าวมาแล้ว (ถ้าจะปรับเป็นรหัสคงที่ก็ต้องมาปรับตรงนี้) แต่ปกติจะตั้งไว้ตามรูปนั่นแหละ


::      ::      ::

Another one I would like to refer to is "protocol". What is it?  A protocol (www.wikipedia.org) is a system of digital message formats and rules for exchanging those messages in or between computing systems and in telecommunications.  And in our network we use the TCP/IP (comes from "Transmission Control Protocol and Internet Protocol).  Now Thailand uses IPv4 protocol, but Thai government by Prime Minister Yingluck Shinawatra is going to change the Internet protocol of the country with another version, IPv6 protocol, which has more capacity and efficiency of transmission. 


มี อีกเรื่องที่ครูอยากจะพูดถึงก็คือ "โปรโตคอล" มันคืออะไร?  ถ้่าจะว่าไปนะ คำๆ นี้ มันเป็นภาษาที่ใช้ในวงการฑูตเขา คือกรณีที่ต้องมีการติดต่อสื่อสารกันระหว่างพวกฑูตของประเทศต่างๆ เขาก็จะต้องมีวิธีการ มาตรฐาน ระบบระเบียบต่างๆ ที่เข้าใจตรงกัน และเขาเรียกว่า protocol ทางวงการคอมพิวเตอร์ก็ไปขอยืมคำศัพท์ของเขามาใช้บ้าง  โปรโตคอลของเครือข่ายคอมพิวเตอร์ (www.wikipedia.org) ก็คือ ระบบของรูปแบบข่าว สารเชิงดิจิตอลและกติกา ของการแลกเปลี่ยนกันระหว่างระบบคอมพิวเตอร์และโทรคมนาคม  ซึ่งทุกวันนี้ โปรโตคอลที่เราใช้ในเครือข่ายนั้น คือ ทีซีพี/ไอพี (โปรโตคอลควบคุมการส่งข้อมูล และอินเทอร์เน็ตโปรโตคอล)  และ ตอน นี้รัฐบาลไทย ภายใต้การนำของ ฯพณฯ ยิ่งลักษณ์ ชินวัตร  ก็กำลังปรับเปลี่ยนอินเทอร์เน็ตโปรโตคอลของประเทศเรา ที่ขณะนี้เป็นเวอร์ชัน 4 ให้เป็นเวอร์ชั่น 6  เพื่อรองรับปริมาณของเครือข่าย และประสิทธิภาพที่ขยายเพิ่มขึ้น


วันอังคารที่ 2 กรกฎาคม พ.ศ. 2556

Visul Basic 6.0 : Exercise แบบฝึกหัด วิชวลเบสิก 6.0

Teacher  Phaitoon  Yaemprasuan  :   occupatech@gmail.com
                                                                http://picta55.blogspot.com


Exercise 1

Calendar/Time Display

1 Design a window application that displays the current month, day, and year.  Also, display the current time, updating it every second (look into the Timer control).  Make the window look something like a calendar page.  Play with object properties to make it pretty.

ให้ นักเรียนออกแบบหน้าต่างแอ็ปปลิเคชัน ที่แสดงเดือนปัจจุบัน วันที่ และปี  และยังแสดงเวลา ณ ปัจจุบัน ที่จะอัปเดตทุกวิยาทีอีกด้วย (เหมือนกับนาฬิกาจับเวลา)  หน้าต่างแอ็ปปลิเคชันนี้จะคล้ายเหมือนใบปฏิทิน  และให้นักเรียนตกแต่งอ็อบเจ็กต์ต่างๆ ให้ดูดี


2 Configure the properties of the related objects like the followings.
 ทำการตั้งค่าต่างๆ ให้กับอ็อบเจ็กต์ที่เกี่ยวข้อง เหมือนค่าที่กำหนดมาให้ตามนี้

Configuration 1

Configuration2

Configuration3

3  Attach the source codes to the objects. There is only the Timer "timDisplay" object that we have to attach our source codes to.  Although there is no any variable declared, but we have to type the code "Option Explicit" at the General Declarations module.
 ทำ การผูกซอร์สโค้ด (รหัสโปรแกรม) เข้ากับอ็อบเจ็กต์  สำหรับงานนี้จะมีเพียงอ็อบเจ็กต์ไทเมอร์ ที่ชื่อ timDisplay เท่านั้น ที่เราจะต้องใส่โค้ดผูกไว้

Source codes that we have to type.

This is the "Sample Special" output of our project ,
(according to our "date/time" format of our machine configuration)
ตัวอย่าง ผลการรันโปรแกรม
(การแสดงผล ขึ้นอยู่กับการตั้งค่า รูปแบบ "วัน/เวลา" ของเครื่องคอมพ์ที่นักเรียนใช้งานอยู่)